The maintenance works in the area J1
Amer
Ahmed
Conservation
Assistant
Tell
Mozan/Urkesh Excavations
Extraordinary amounts of rainfall in the winter
and spring of 2019 in Hasake Provence, Syria
resulted in damage to the third millennium temple mound at Tell Mozan. A
portion of the revetment wall at the
junction of Mittani and EDIII construction
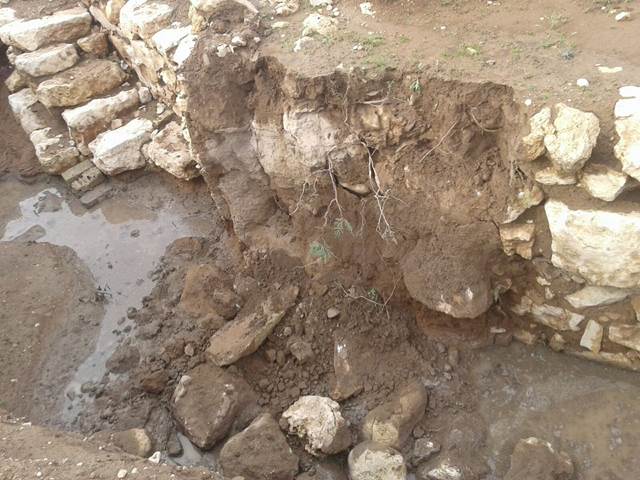
(excavation unit J5) was washed out (Fig. 1).Baulks in the lower plaza (excavation
area J1) collapsed ( Fig.2 ). After
consultations with the archaeological staff, we designed and implemented
temporary measures such as seds (water
diversion channels) to mitigate the damages.
At the end of May 2019 the rains abated and work to effect a more
permanent solution began. As the regular Mozan workmen were unavailable,
laborers from nearby communities assisted in cleaning, bagging soil, and
lifting stones. This phase took ten days with breaks for seasonal harvests.
Fig.1 . The crumbled wall in unit J5
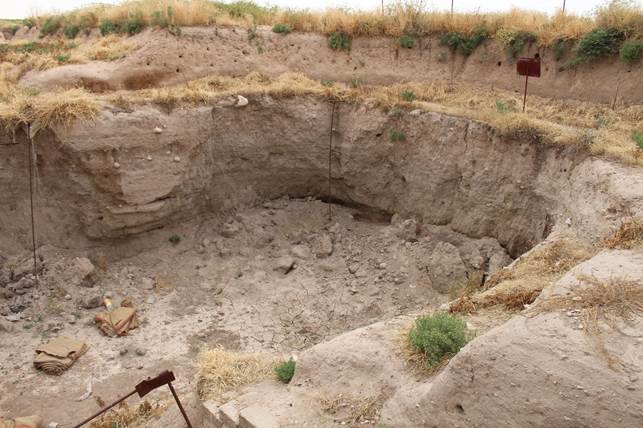
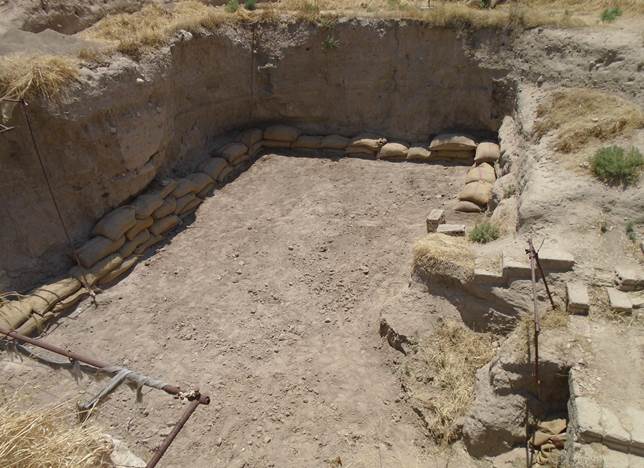
Fig.2 . The unit J1 before the work
The works
included the following :
We
startedinJ5wherethesection of the Mittani revetment wall turns to join the EDIII revetment
wall. The huge stones were scattered on the ground with accumulated
soil on them (
Fig.3 ). Because we
lackedenoughexperiencetorestore
thiswall section,a temporary structure was built to
preserve the stones and protect the remaining sections of the revetment wall
until a full archaeological team returns to the site.
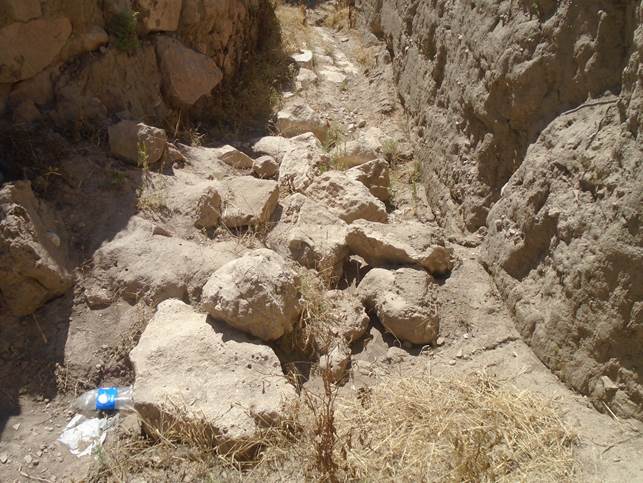
Fig.3 . The accumulated soil and scattered stones in
J5
The
first day, on Thursday 29 / 5 / 2019 :
We started
removing the soil which accumulated on the stones (Fig
.4). Thenwe
sortedthemtoputthebiggestonthebottomtoform
abase. Wewerevery careful to not disturb the soil that
remained from behind the revetment wall.(Fig.5). Thesoilwasreddishandfreeofstraw and sherds, but it contained a
few small stones. It appeared that none of the soil had
been sifted.
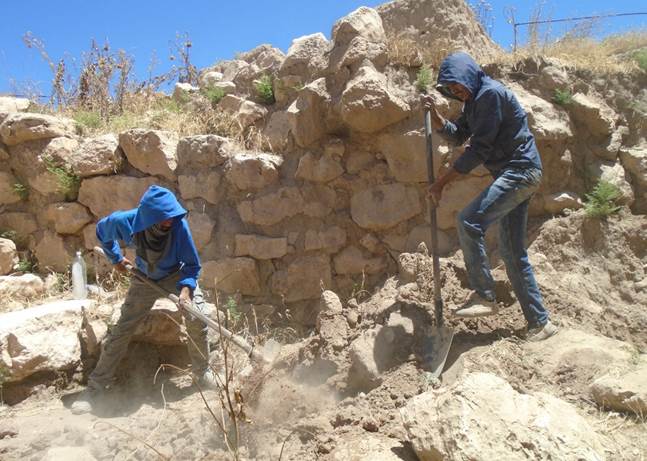
Fig.4 . Removing the
soil - the unit J5
Fig.5. The soil which remained behind the
revetment wall in J5
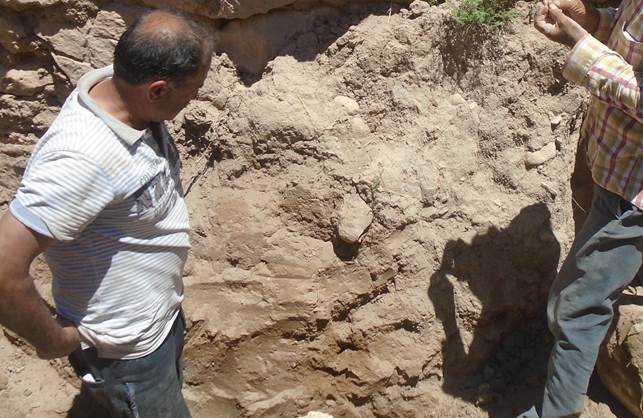
After cleaning and soil removal we reached the
last excavated level, escarpment 1 (^esc1). We placed a sheet of naylon
(plastic) on the escarpment to denote the start of the temporary repair (Fig.6 ).
Then we began the repair by using
the biggest stones as a base.
Fig.6.
Placing nalon under the stones in
J5
The
second day, on Saturday 1 / 6 / 2019 :
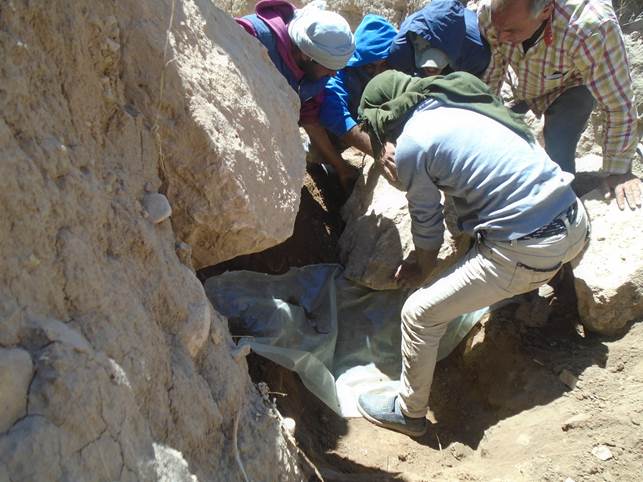
The work continued in the unit J5 but because of
the difficulty of lifting stones wehave
reliedonaninstrumentcalledal-Wensh (tripod
winch) tolift the stones (Fig.7); however,
we were having difficulty working because of the large stones.
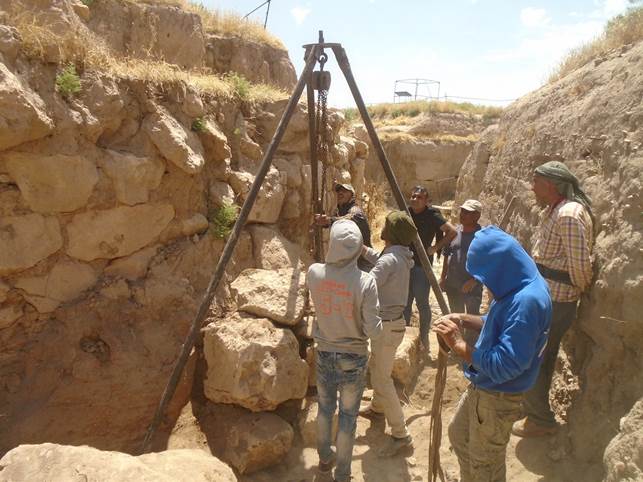
Fig.7.
The al-Wensh in action in J5
After the stones were lifted and placed using
the al-Wensh, masonry mud (a mixture of soil,
straw and water) was used to fill the gaps between the stones (Fig.8 ).
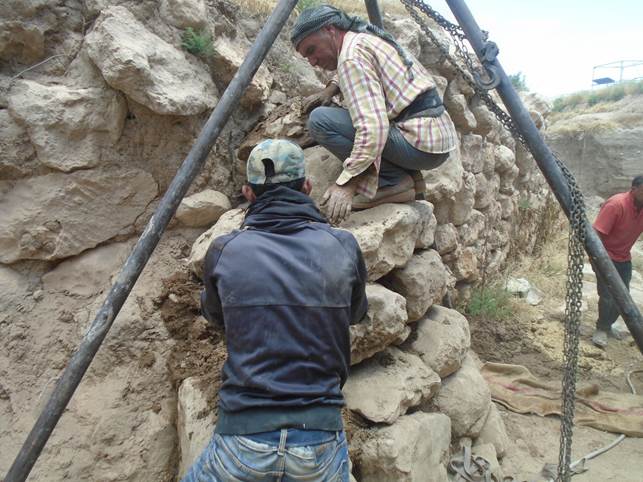
Fig.8.
Filling the gaps between the stones with mud in J5
The third
day, on Sunday 9 / 6 / 2019 :
We worked in both units J5 and J1
.
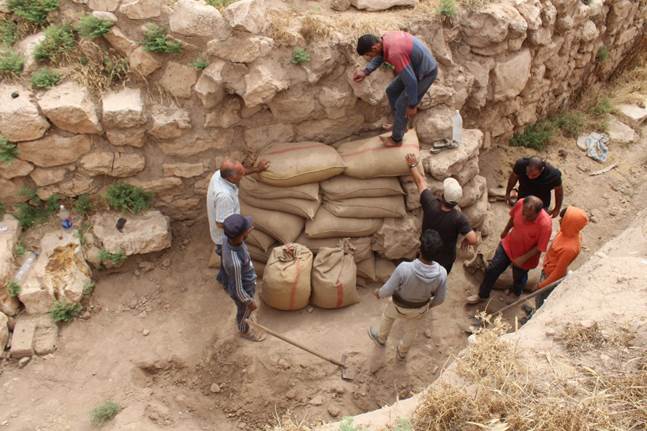
InJ5,afterwefinishedplacingthestones
weneededtostrengthen the standing section of the
revetment wall of the temple as well as we could, cover the soil which remained
behindthewallofthetemple, and protect the reconstructed
section. Because we wanted the
repairs to have aesthetic appeal until it could be restored
properly, we built a
protective collar around the stones using burlap bags filled with the soilwhich
surrounded the collapsed wall section(Fig.9). The bags were
carefully placed until we reached the highest point possible ( Fig.10 ). Then we ran
out of the soil from the collapse.
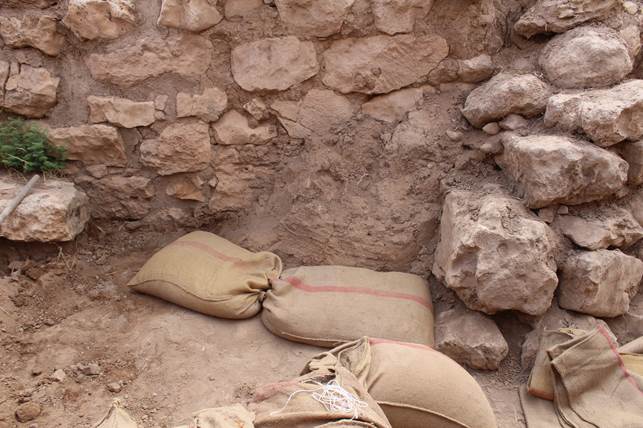
Fig.9. Burlap bags filled with soil in
J5
Fig.10. The highest point reached on third day
in J5
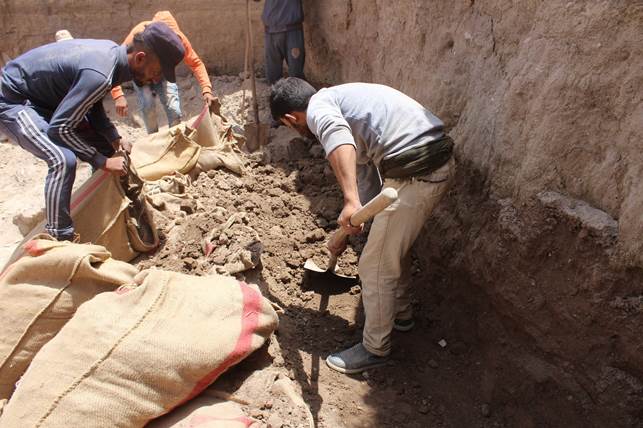
As for
the unit J1, we began to remove the soil beside the damaged section
onboth
the southandeastsides(Fig.11).
We filled bags with this soil
which was to be used later to help protect the section against
further damage (Fig.12).
Fig.11.
The start of the work in unit J1
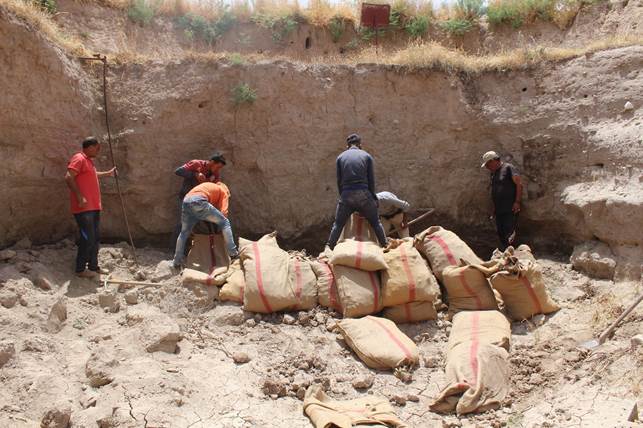
Fig.12.
Filling the bags in J1
The fourth
day, on Tuesday 11 / 6 / 2019 :
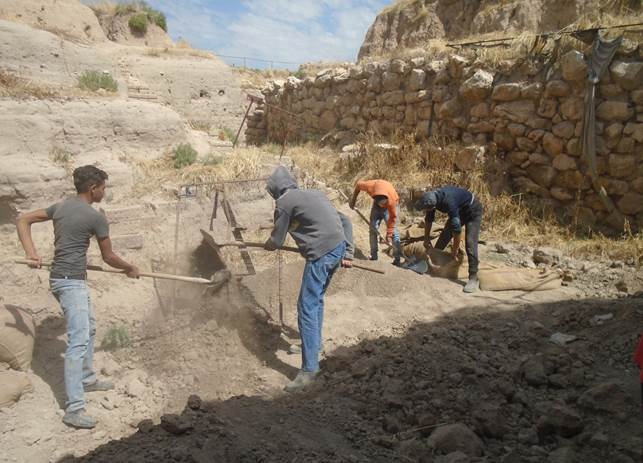
The process of removing soil beside the east and
south sides of the section in theunitJ1continued,aswellasplacingthebagsintheeasternside(Fig.13).as
tothesoilwhich
came from the section and will be used willbeusedfor
theprotectionofthetemple’s
wall,we elected
to sift it to recover
sherds or other objects of archaeological interest (Fig.14).
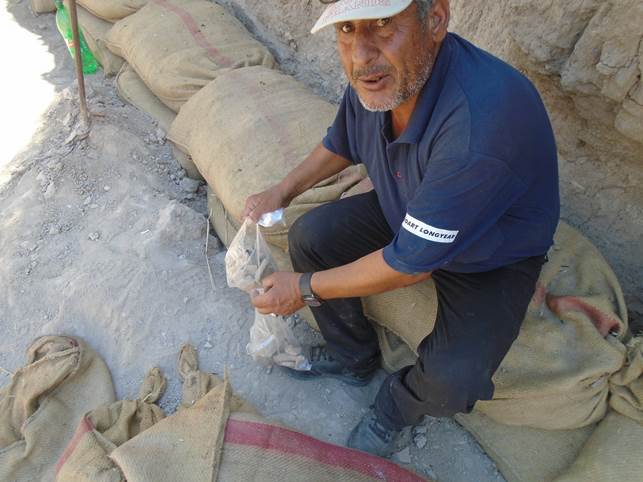
Hammadi (our ceramics specialist) was interested in collecting every fragment
that appeared as a result of the sifting process (Fig.15).
Only sherds were recoveredand
personally bagged by Hammadi (Fig.16). The sifted soil was bagged
and transferred to the top of the
section and wall to be used later for building protective structures (Fig.17).
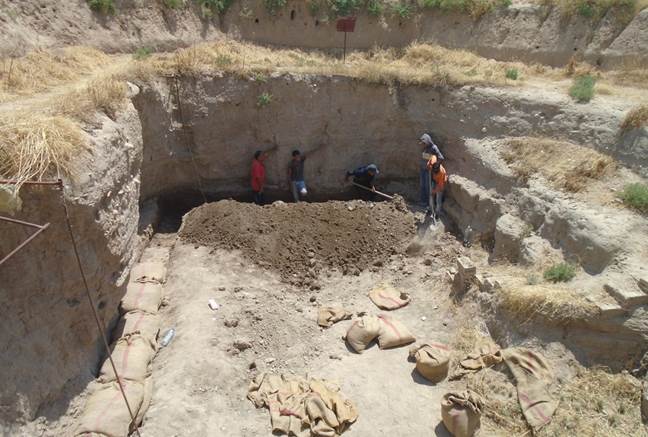
Fig.13. The work continues in J1
Fig.14. Sifting the soil in
J1
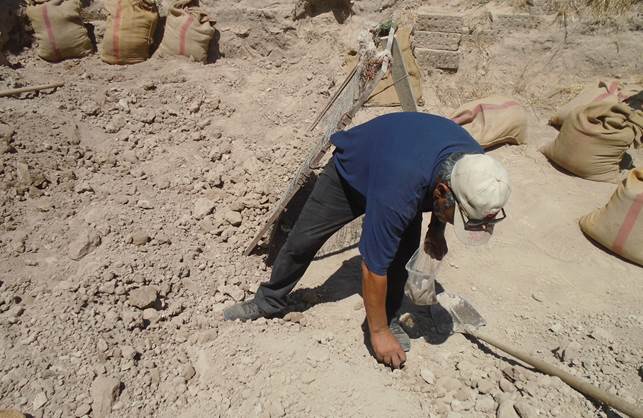
Fig.15. The pottery shards are collected by
Hammadi in J1
Fig.16. The pottery shards are put in plastic
bags in J1
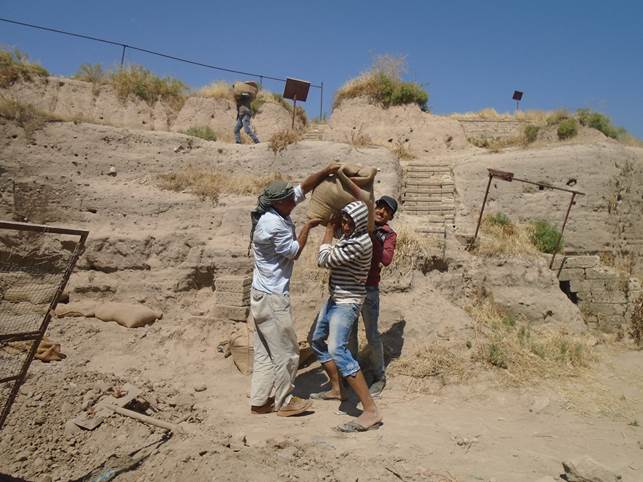
Fig.17 . Transferring the soil bags to the top - the unit
J1
The fifth day,
on Sunday 23 / 6 / 2019:
We worked
in both J1 and J5.
InJ1,wecontinuedfillingbagswithsoilandplacingthemon theeasternandsouthernsidesofthesection(Fig.18). We also sifted and bagged soil and
transferred it to the top of the wall.
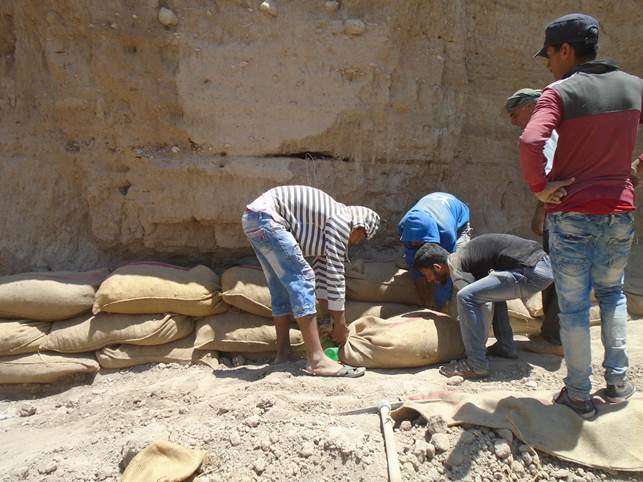
Fig.18.
Placing the soil bags at the foot of the section in J1
As for
the unit J5, after we ran
out of the soil from the collapsed pedestal which supported the Mitanni
wall, we used the soil which also had previously eroded from the section across
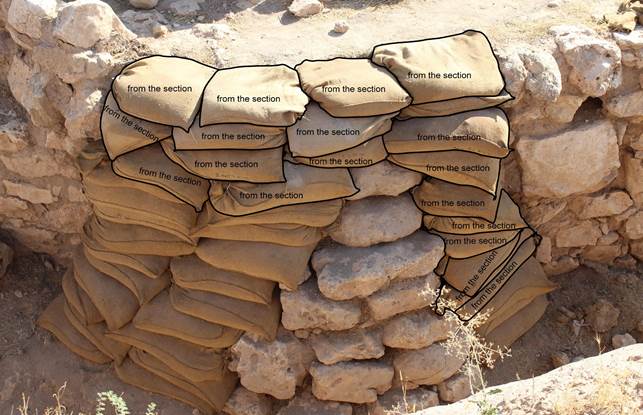
from the collapsed wall section to finish building the protective collar (Fig.19). The bags which have
been filled from the section’s
crumbled soil were identified in a photo which I have
annotated by the Freehand Program (Fig.20).
Then we completed work on the collar (Fig.21).
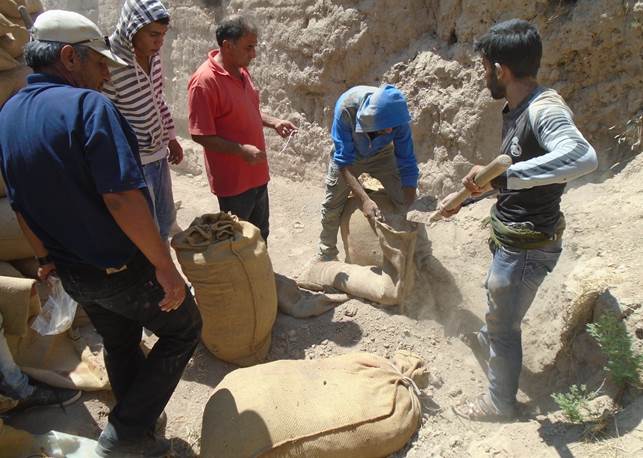
Fig.19. Removing soil from the collapsed section
in front of the pedestal
Fig.2. Annotated photo showing which
bags came from the J5 section
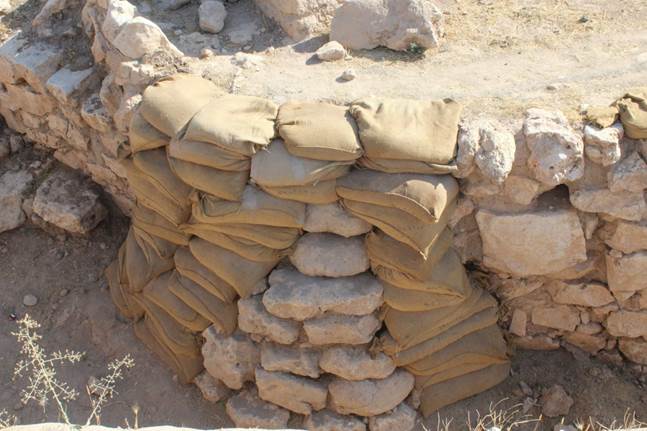
Fig.21.
The completed protective collar in J5
The sixth day, on Tuesday 25 / 6 /
2019 :
We finished the work in J1, where the soil bags
have been placed and the surface leveled within the unit (Fig.22
and 23).
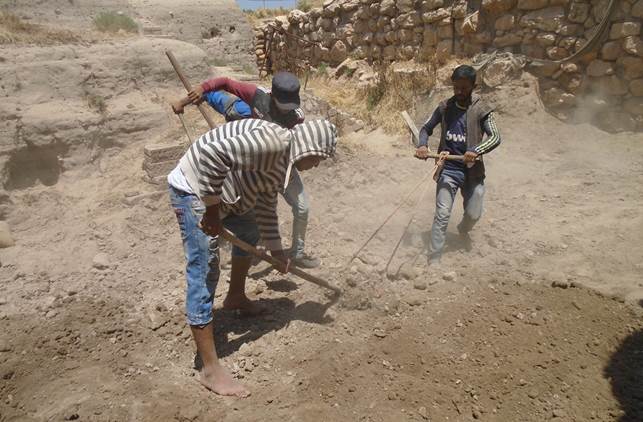
Fig.22. The process of leveling the soil in the
unit J1
Fig.23 View
of the completed leveling work in J1
The
seventh day, on Sunday 7 / 7 / 2019 :
After we finished the work inside J1, we moved
to the second phase which is to build a protective structure atop and in front
of the sections. We installed a framework of iron rods (Fig.24)
and covered it with tutia (corrugated metal sheets) (Fig.25),
which was attached to the iron rods in order to protect the section’s
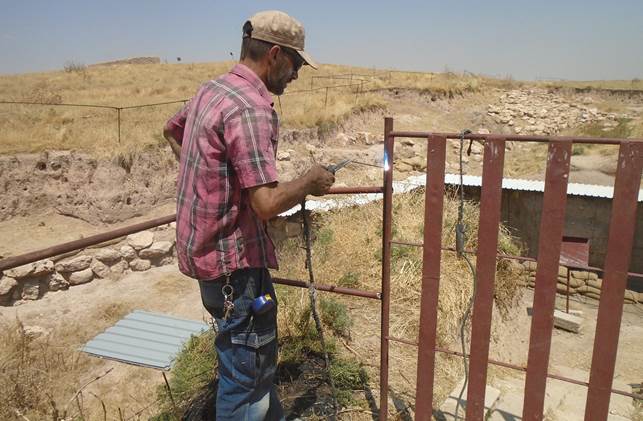
vertical surface from the rain in winter. In addition, we welded the
broken western door leading to J1
(Fig.26), thus finishing
construction work in J1 (Fig.27).
Fig.24.
Installing the iron rods in J1
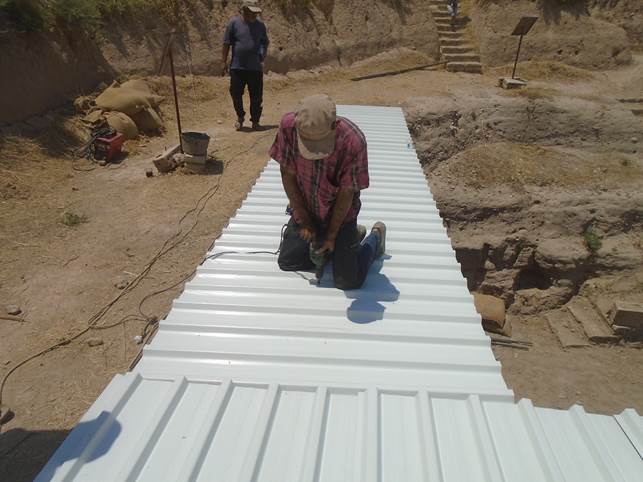
Fig.25. Attaching the tutia to the iron rods in
J1
Fig.26. Welding the iron door in the unit
J1
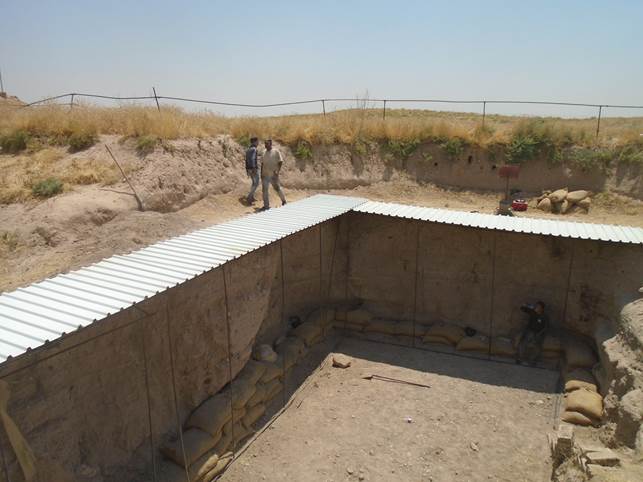
Fig.27.
Iron rods and tutia secured in place in J1
The eighth day, Tuesday 16 / 7 / 2019 :
After installing the iron rods and tutia,
we covered the top inside edges of the tutia with soil (Fig.28)
to prevent leakage of rainwater
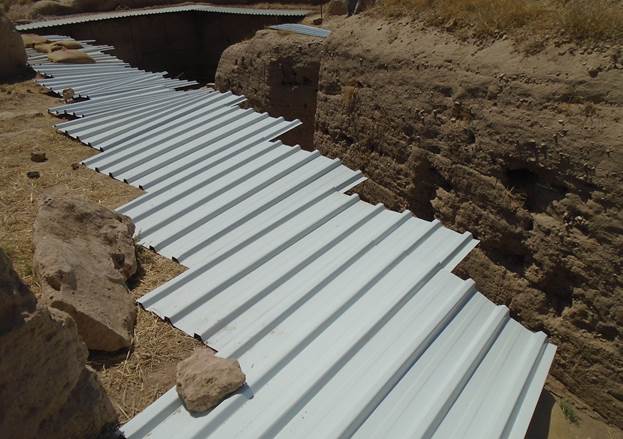
that may cause damages to the section. Then we placed tutia on the
top surface of the revetment wall running
from J1 through J5. Here we faced obstacles, because the large stones on
the wall-toppreventedusleveling the sheets of tutia, which were
being tilted and skewed (Fig.29).
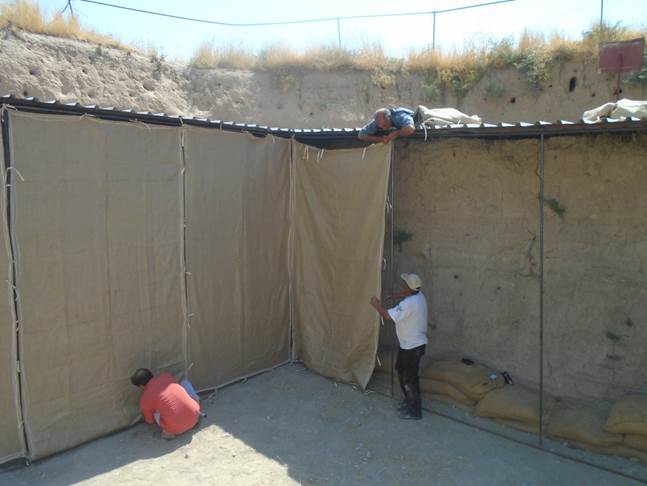
Becausewewouldhave
neededalargeamountofsoiltolevelthe
tutia,we decided to build a
curtain using jader (burlap) to cover all the wall from top to bottom and
anchoring it by bags of soil atop a layer of clay (Fig.30). This system will be installed at the end
of autumn and removed around the middle of March after the end of the tourist
season.
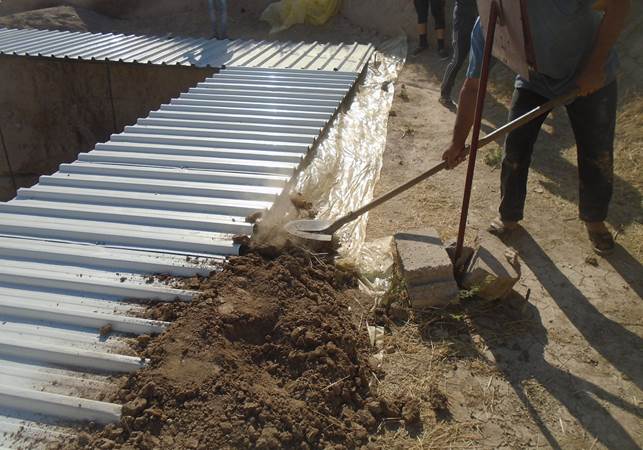
Fig.28 . Covering the
edges of tutia with soil in J1
Fig.29. Failed test of revetment wall protection
using tutia
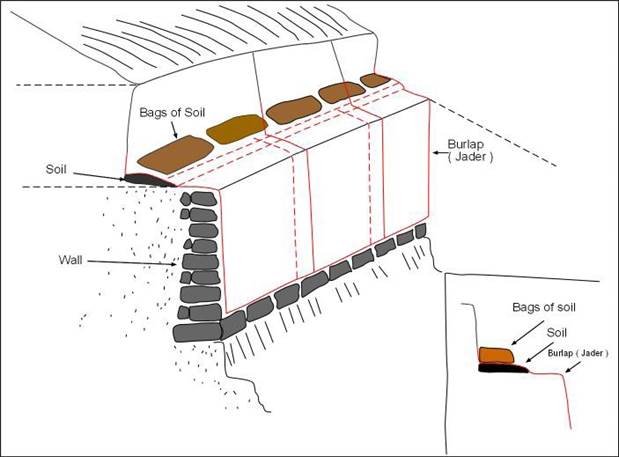
Fig.30.
Recommended system to protect revetment wall
The ninth day, on Saturday 31 / 8 /
2019 :
After finishing work in the unit J1, where the
iron rods and tutia have been in-
stalled, we installed a burlap curtain backed with naylon (plastic) (Fig.31)
and attached by ribbons on the iron rods (Fig.32)
to protect the section from
further erosion. Themetal rods were spacedabout
180 cm apart, except in the
corners of the unit (northeast and southwest corners
) where the naylon
sidewas installed against the wall of the section. The unit J1 after finishing work on the ninth
day is shown in (Fig.33).
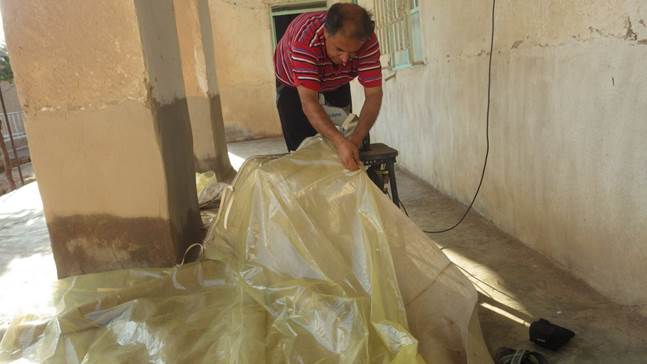
Fig.31.
Sewing the jader (burlap) with naylon
(plastic)
Fig.32.
Affixing the curtain onto iron rods by ribbons in J1
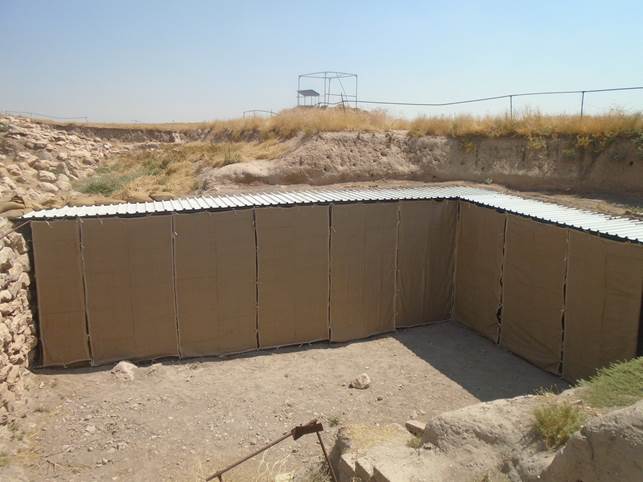
Fig.33.
The unit J1 from the northwest side
The tenth
day, on Sunday 8 / 9 / 2019 :
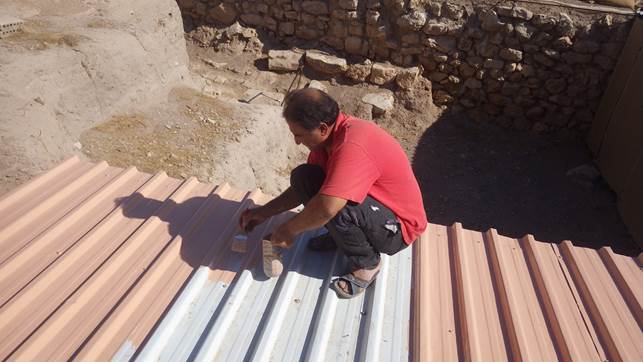
We painted
the tutia in the unit J1, where we have
mixed three colors (light brown,whiteandorange)(Fig.34),inordertomatch the color of the surrounding soil
(Fig.35 and 36).
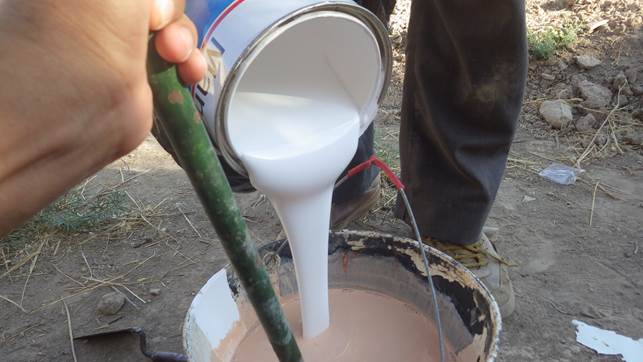
Fig.34. Mixing the color
Fig.35.
The painting process
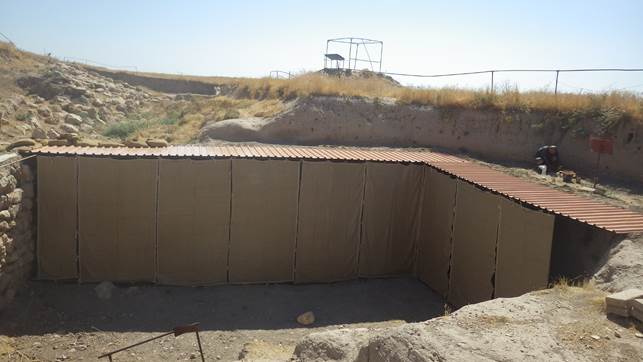
Fig.36.
The finished product after painting